Using Manual Forms
TABLE OF CONTENTS
- Using Manual Forms
Introduction
Not all content for flights, hotels, cars, rail, and limos is available for booking directly via the Spotnana OBT. As a result, agents also have access to a Manual Form within the OBT to accommodate bookings that have been made outside the OBT (e.g., on another vendor's site directly). This form allows you to import the bookings into the OBT, so the traveler can see all of their travel plans and booking in a single centralized place.
Since the bookings that have been made outside OBT won't automatically be shown to users in their Trips page (or in analytics), we need to manually input the booking information. To store these bookings in our OBT and make them available to all downstream consumers, we need to collect this information via the manual form.
The Manual Form is used to import bookings made on another vendor's site into the OBT. This allows the traveler to see all of their travel plans in one convenient place. It also us to pass payment-related details to our accounting system.
Creating the trip (or using an existing trip)
Click Trips.
Select New Trip next to the user profile.

The Create a New Trip box appears. Enter the trip name and provide a description.

Click Save. You will be brought to the Trips page.
Depending on the type of booking, click the relevant option (e.g., Add flight, Add hotel, etc.)
There are then two options to choose from. For flights, it would be Search Flights. This option will just search inside the OBT as with a normal booking. Outside Booking will allow you to fill out all fields manually.
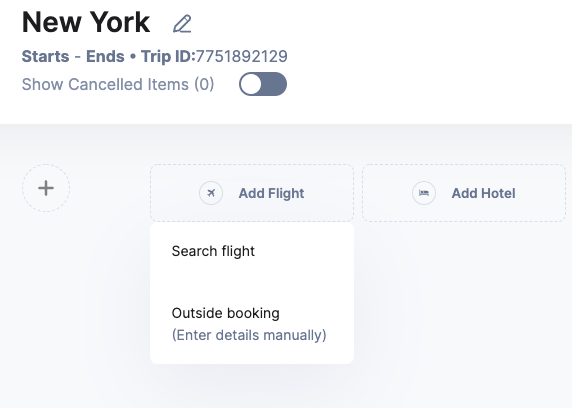
Choose Outside booking.
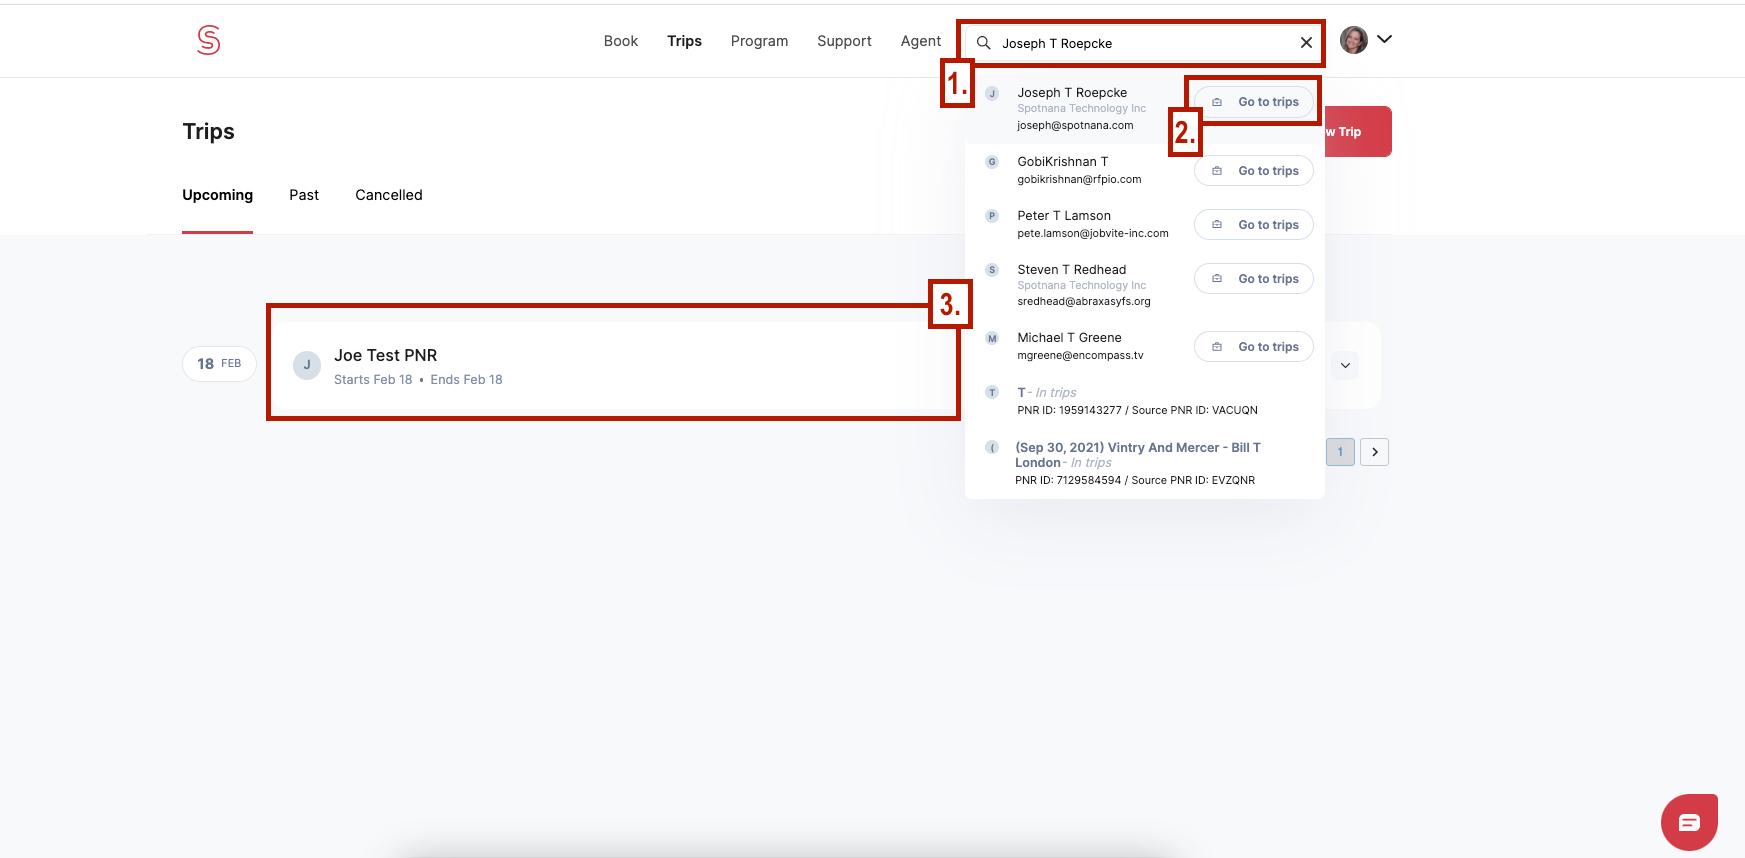
An alternative way to start a manual form is to (see annotated screen image below):
- Choose a traveler.
- Select Go to trips.
- When on the Trips page select the trip you would like to add the Manual form to.
Working in the manual form
In the example here, the manual form is the one used for flights. Each booking type has a specific one, since the fields needed for each will be slightly different (e.g., air, hotel, car). The form will be blank when it first opens.
Fill in all the required information to build the booking.
Let’s examine the fields in more detail:
You can add additional travelers.

You can add the flight information, including:
- Ticket number
- Third-party Vendor information (where it was booked)
- Third-party Confirmation number.
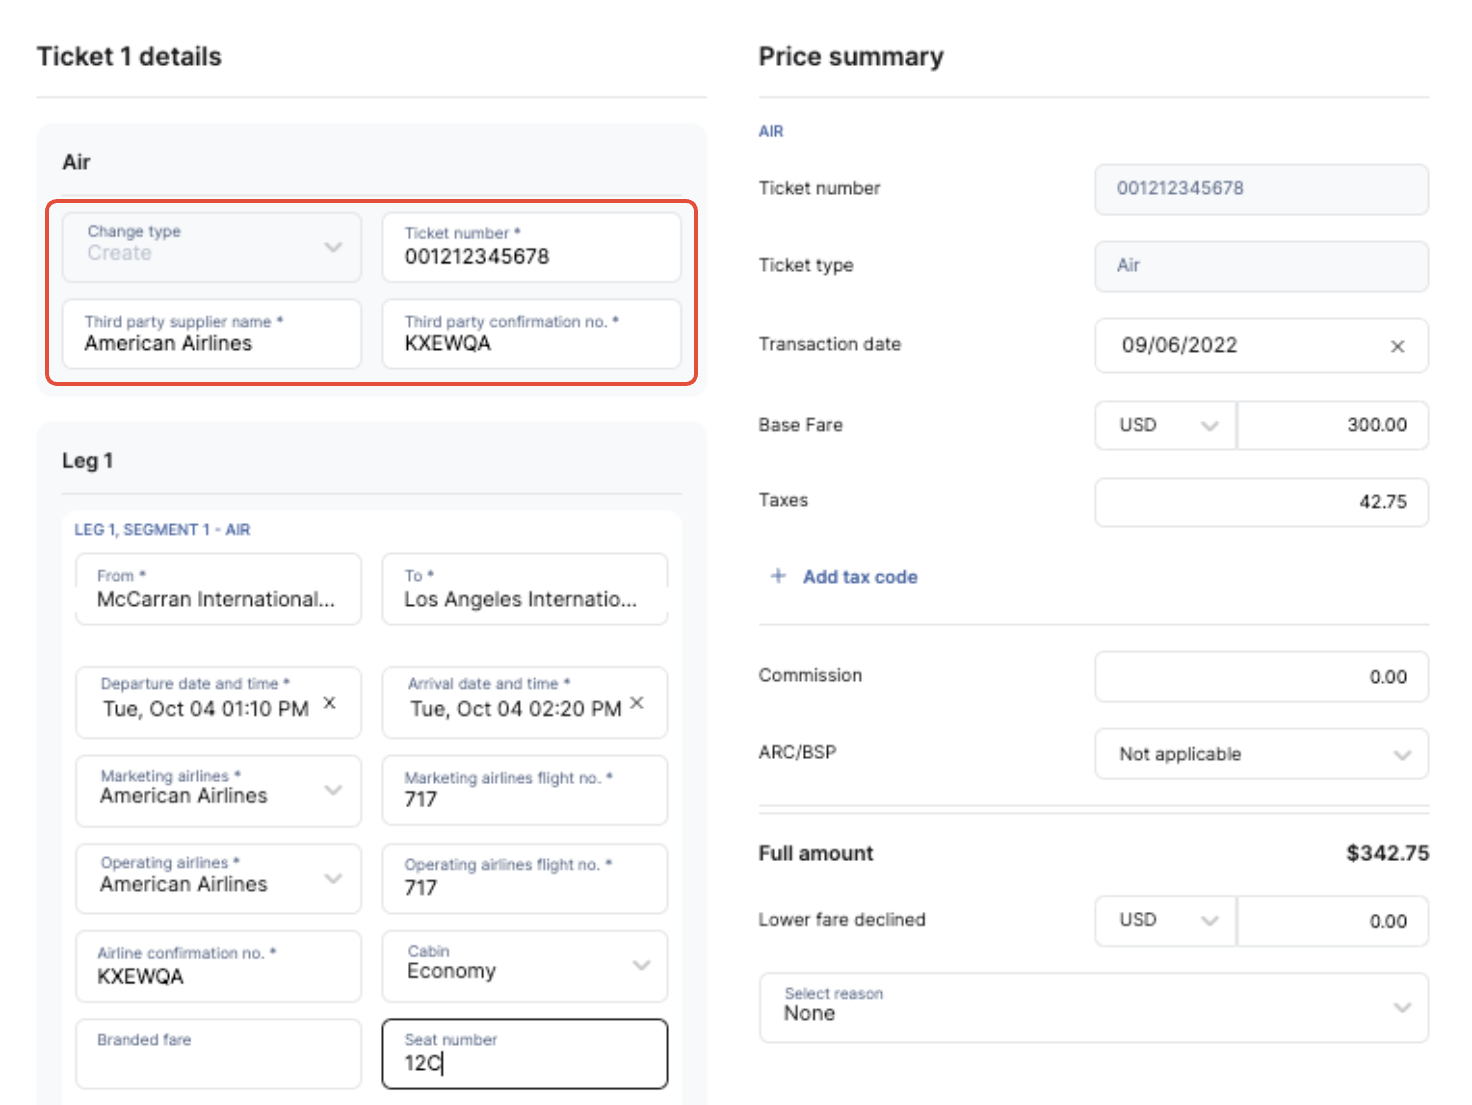
You can then enter:
- All the specific flight leg information.
- Departure and arrival date and times.
- Marketing Carrier (whose ticket stock it is on).
- Operating carrier (If plane being flown is different from marketing carrier).
- Airline Confirmation number.
- Cabin and Seat.
The ticket number and ticket type information will automatically be filled in in the Price Summary section.
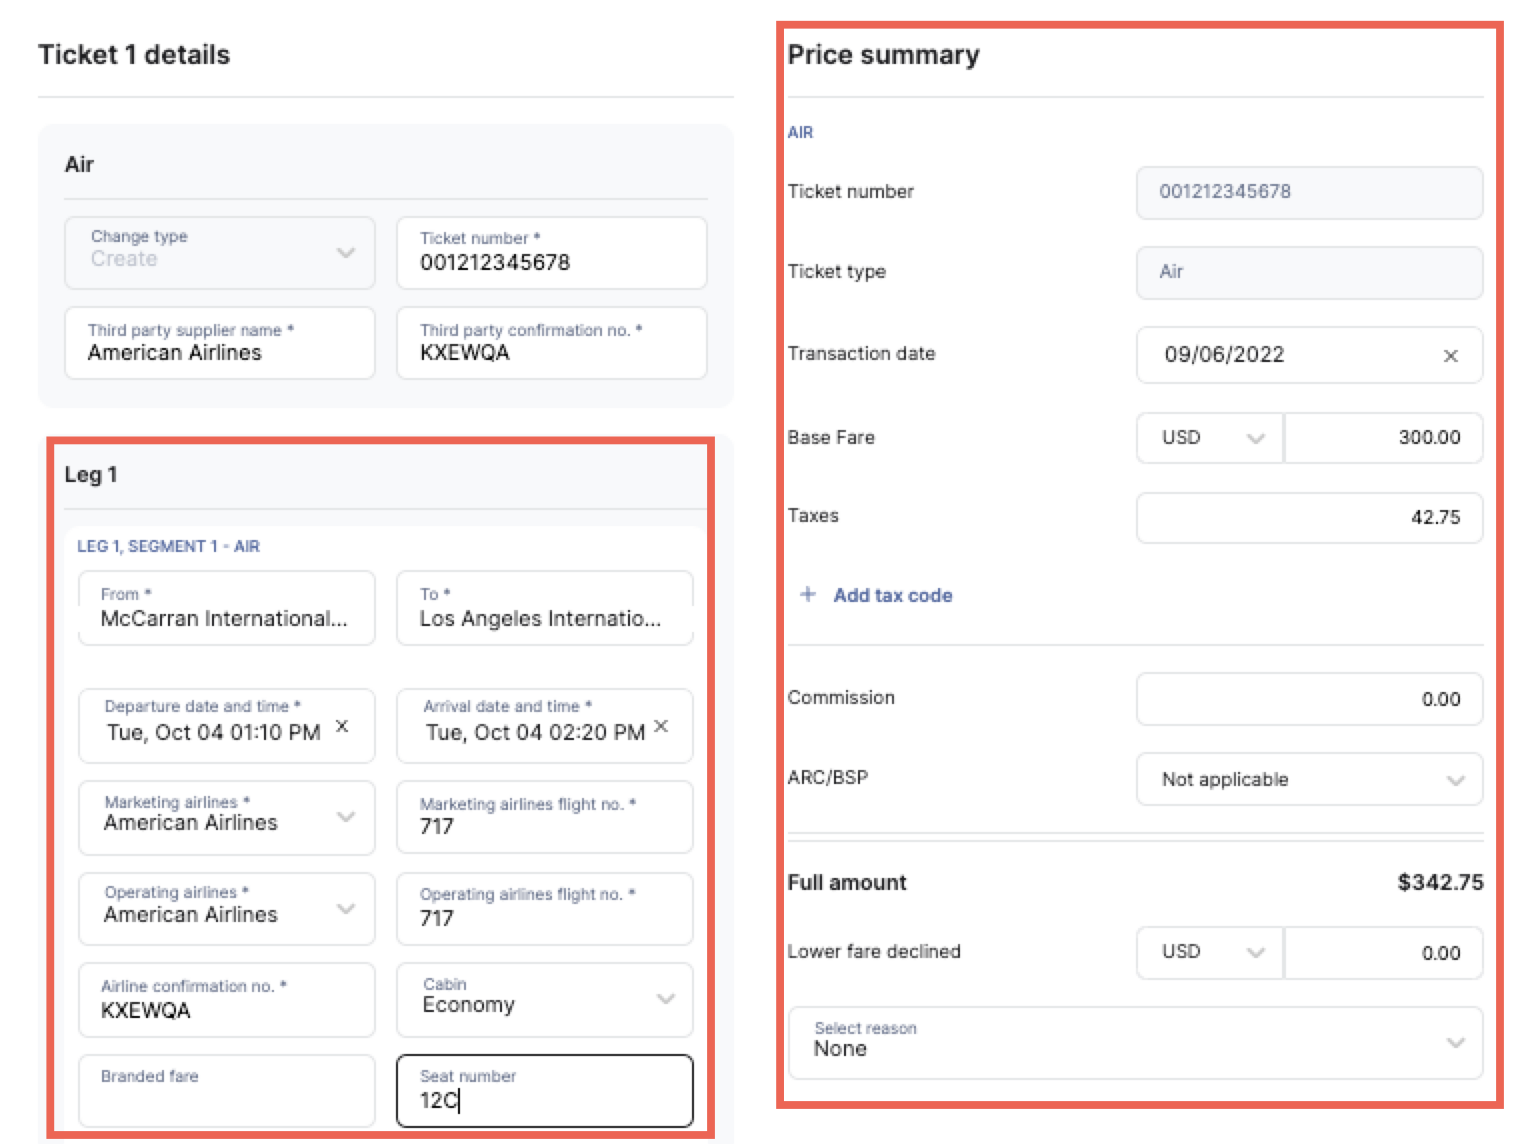
Then provide the following information in the Price Summary section.
- Transaction date
- Base fare and taxes. Specific taxes can be added as well by clicking Add tax code.
- Commission (optional)
- ARC or BSP (this also helps to understand any void period).
Policy (if a lower fare was declined, you can add the amount of said fare along with the reason for it being declined).
Connections or additional flights can be added. For example, air segment 2 to leg 1 for a connecting flight.

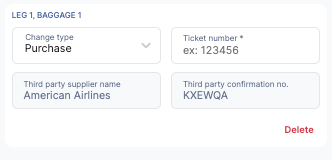
Baggage Purchases can be added as well.
If the booking is out of policy, this can also be noted.

- If the reservation been paid for (such as TF pay or check), select that payment method in the Payment Options field (under the Payment section).
- If there is a balance still due, select the form of payment in the Payment Options field (under the Payment section) that the finance department should use to charge the customer.
- If the traveler was already charged on the third party site (e.g., a Traveler's card was selected in the Payment Options field), then the Charging Method field will be set to Paid and our accounting system will not collect additional funds from the client.

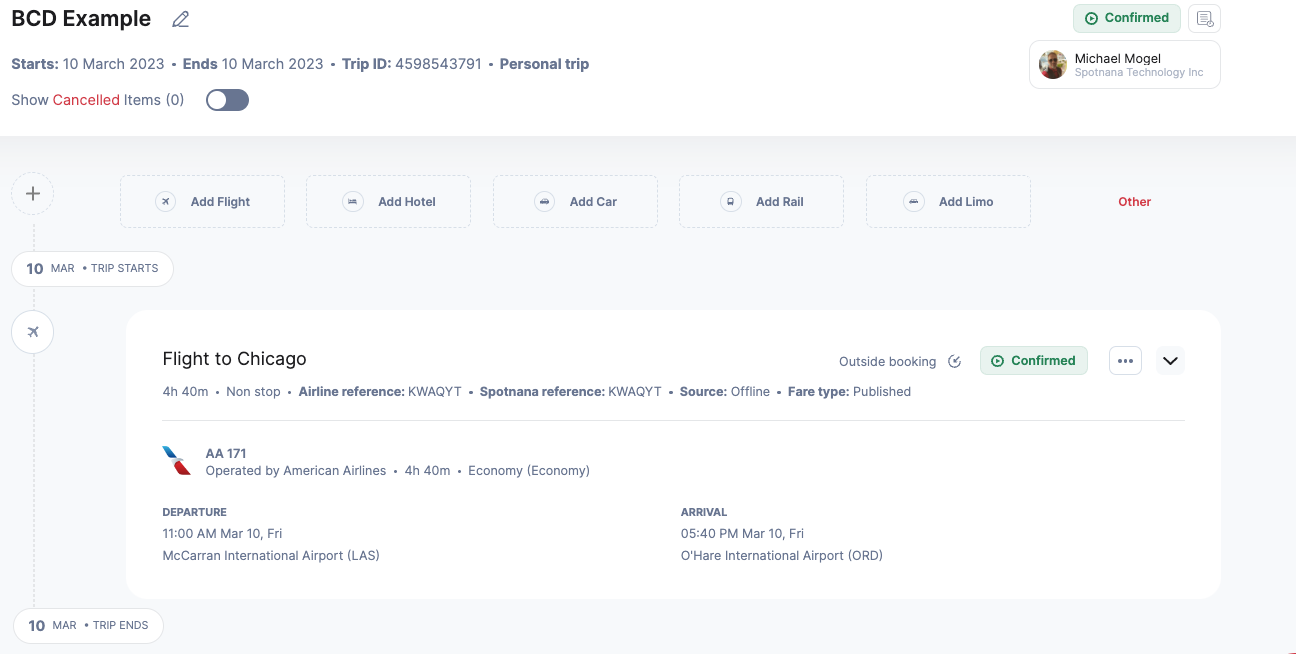
When done, click Save. The booking will now be listed under an Itinerary on the Trips page and will display a status of Confirmed.
Editing using the manual form
To edit/cancel using the manual form, open the OBT and locate the booking you want to edit or cancel.

Then click Update (or Cancel).
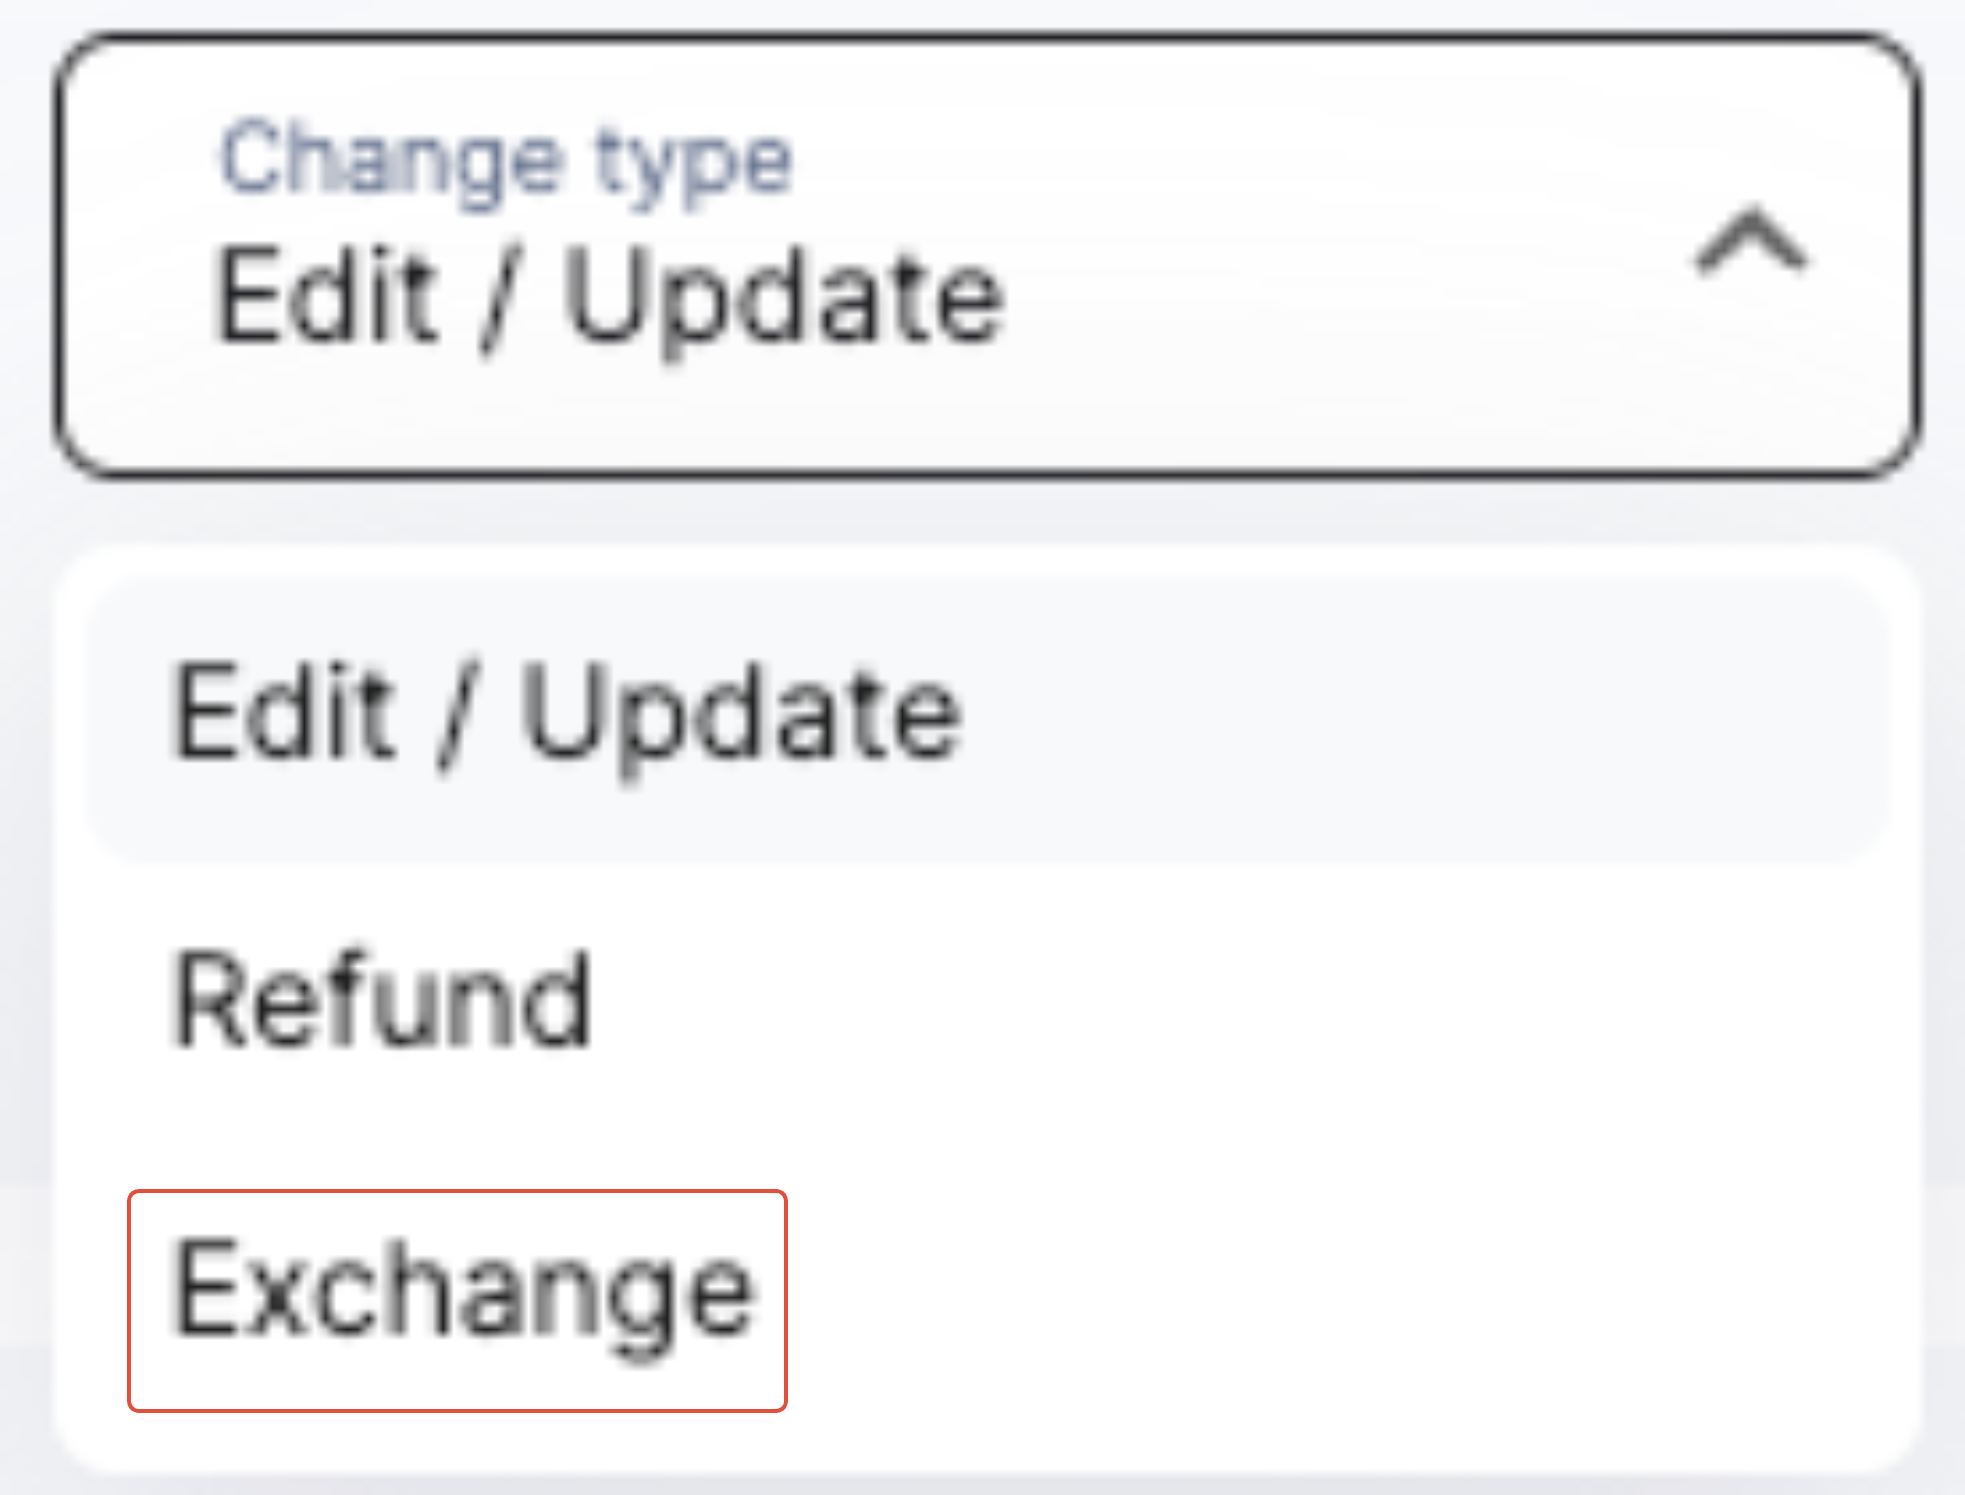
If a change was made to the airfare on a supplier's website, you can use the "exchange" workflow to update the OBT with any flight details and the change cost (if applicable).
Choose Exchange from the Change Type menu.
Then update any information and Penalty/Base Fare/Taxes as needed and click Save.
Cancelling using the manual form
If the trip was cancelled, you can follow these steps to cancel via the manual form.
Choose the Refund from the Change Type menu. This is the correct selection even if
cancelling the flight results in a future credit instead of a refund)
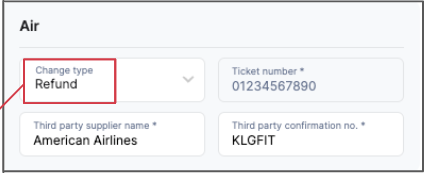
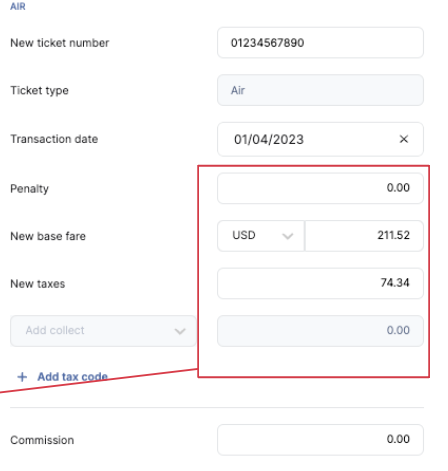
When done, click Save. The manual form will now show the booking as cancelled and it will be removed from the itinerary.

Completing custom fields
The manual form will not allow you save any changes without addressing the custom data fields.
Fro example, one field that may be required is Reason for Travel. Select the reason for the travel booking.

Click Save.
Updating a hotel booking using the manual form
The manual form used to update a hotel booking has the following fields:
This form is used to reflect changes made to a hotel booking on a supplier's website. To edit or cancel the booking, locate the booking in the OBT and click Update or Cancel.
Then, when the manual form is displayed, do one of the following:
- To cancel the booking, select Refund from the Change Type menu. Then update any Penalty/Amounts if refundable. For example, if there is a one night penalty, you would update the amount minus the cost of one night. Then click Save. The hotel booking will be updated to a status of Cancelled in the OBT
- To update the booking, select Edit/Update from the Change Type menu. Then update any required information and Penalty/Base Fare/Taxes. Then click Save. The hotel booking will be updated with the changes you made in the OBT.
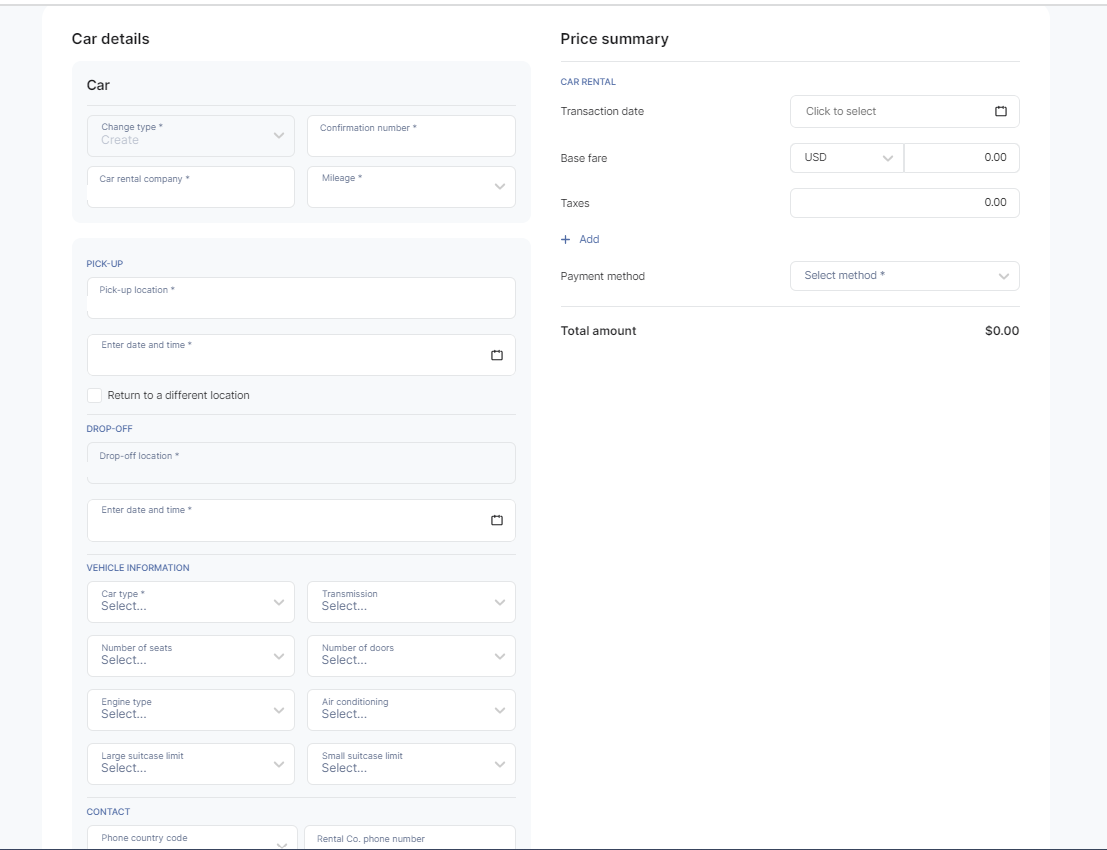
Booking car rentals using the manual form
The manual form used to make a car rental booking has the following fields:
Tips for working with manual forms
General tips
- The Manual Form allows agents to store offline bookings in the Spotnana OBT. This form is only accessible to agents (not travelers or admins). It should be used to add and update all information that is required for offline bookings.
- If you need to change a form or payment, you will need to fill out a completely new manual form to update that information.
- The Out of policy field can be enabled to denote that a booking is out of policy. The fact that a booking was out of policy will appear in analytic reports. However, OOP bookings made via the manual form will not generate approval or notification emails.
For Flights
- For LCC’s and ticketless carriers, the PNR number should be used for the ticket number.
- When exchanging a ticket, the New Ticket Number should be different from the Original Ticket Number.
- For flights with ancillaries, each section of the manual form area should have its own ticket number and breakdown of base fare and taxes. For example, the flight itself will have its own ticket base fare and taxes, then any baggage or seat reservations will have a separate ticket number each with their own base fare and taxes. For bag and seat reservations an EMD (Electronic Miscellaneous Document) number will be generated.
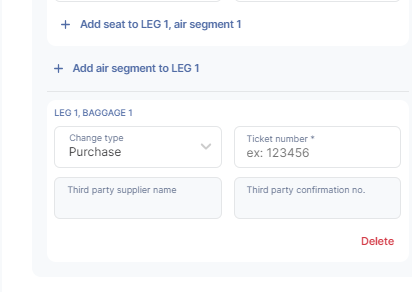
- When exchanging flights that were purchased with ancillaries, the ancillaries must be refunded first. After the ancillaries have been refunded, then exchange the flight ticket.
For Hotels
- Cost per night (base) for hotels: This value is automatically multiplied by the number of nights added.
For Car rentals
- Multi passenger car rentals are supported. The Add Traveler option will appear after the product is selected.
Was this article helpful?
That’s Great!
Thank you for your feedback
Sorry! We couldn't be helpful
Thank you for your feedback
Feedback sent
We appreciate your effort and will try to fix the article